The world of DIY electronics is fascinating. Building custom devices brings great satisfaction. Above, you saw how to create a unique single motor drone. This project is known as a Monocopter. It uses a single propeller for lift and control. Many hobbyists find this design appealing. It offers simplicity and innovation.
This accompanying article expands on the video. We will explore the Monocopter’s unique design. We will discuss critical components. Custom PCBs and 3D printing are vital. Mastering these elements empowers your build. You can achieve a successful flight.
Understanding the Monocopter: A Unique Single Motor Drone
A Monocopter is quite distinct. It defies traditional drone designs. Most drones have multiple rotors. This one uses just a single motor and propeller. It spins its entire body. This rotation generates lift. It also provides directional control. Imagine if a helicopter only had one main blade. That’s conceptually close. The Monocopter’s design is elegant. It uses clever aerodynamic principles. It’s a fascinating project. Its simplicity masks complex physics.
The single motor drone offers several advantages. Fewer parts are needed. This lowers overall cost. Assembly can be simpler. It also presents unique challenges. Controlling its flight requires precision. The entire body rotates. This rotation stabilizes the craft. It also dictates its movement. Careful propeller design is key. The craft’s weight distribution matters. Its flight path can be mesmerizing. It spins and rises effortlessly. This unique approach is inspiring.
Essential Components for Building Your Monocopter
Building a single motor drone requires specific parts. Each component plays a vital role. The video provided a parts list. Let’s detail these crucial elements. Proper selection ensures success. Inferior parts can hinder flight.
-
Brushless Motor: This is the drone’s heart. It provides thrust. A brushless motor is efficient. It offers good power-to-weight. Its size impacts lift. Consider the motor’s Kv rating. Higher Kv means more RPMs. This needs careful propeller matching. The motor mounts to the frame.
-
Electronic Speed Controller (ESC): An ESC manages motor speed. It takes signals from the flight controller. It converts battery power. This drives the brushless motor. Choose an ESC rated for your motor. It must handle the current draw. Proper calibration is crucial. It ensures smooth motor operation.
-
Flight Controller (Microcontroller): This is the drone’s brain. It processes sensor data. It sends commands to the ESC. This maintains stable flight. An Arduino or ESP32 can work. Specific firmware is needed. It interprets user input. It manages flight dynamics. Programmed algorithms stabilize it. This tiny chip controls everything.
-
Propeller: The propeller generates lift. Its design is critical. Pitch and diameter are important. They must match the motor. The video used a custom design. 3D printing allows custom shapes. An inefficient propeller wastes power. It affects the drone’s performance.
-
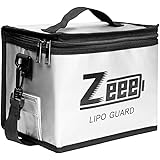
Battery: A LiPo battery powers the drone. Its capacity impacts flight time. Voltage affects motor power. Choose a suitable C-rating. This indicates discharge rate. Secure battery mounting prevents shifts. An improperly balanced battery harms stability.
-
Receiver (Optional): For RC control, a receiver is needed. It gets signals from your remote. These signals go to the flight controller. This allows manual piloting. Ensure compatibility with your transmitter. Binding the receiver is necessary. It links your controls to the drone.
Sourcing these parts is easy. Online stores offer many options. Always check specifications. Read reviews for quality assurance. Getting the right parts is essential. It prevents many future problems.
The Power of Custom PCBs in DIY Drone Building
The video highlighted custom PCBs. They are vital for advanced projects. A Printed Circuit Board simplifies wiring. It ensures reliable connections. No more tangled wires. No more loose solder joints.
Imagine if all your electronics were neatly integrated. Custom PCBs offer exactly that. They provide a robust platform. Components are soldered directly. This reduces size and weight. These are critical for drone performance. A lighter drone flies longer. It performs better, too.
NextPCB, mentioned in the video, is a leader. It is a major PCB prototype manufacturer. They offer extensive services. New users get a generous $100 coupon. This is a great starting point. They also provide a $0 trial PCB service. This includes 2-layer and 4-layer PCBs. PCB assembling facilities are available. These services help bring your designs to life. Ordering is simple: upload your Gerber file. Select color and quantity. Your custom PCB can then be delivered worldwide. This accessibility empowers makers globally. Designing a custom PCB for your single motor drone project is a smart move. It ensures professional quality. It also enhances reliability. This step elevates your DIY project significantly.
Leveraging 3D Printing for Custom Drone Parts
The video mentioned printed parts. 3D printing is a game-changer. It allows for custom designs. Complex shapes are easily created. This is perfect for drone frames. It suits motor mounts and propeller hubs. You can design parts to fit perfectly. This optimizes weight and strength. Imagine a frame tailored exactly to your components. That’s what 3D printing delivers.
Many materials are available. PLA is common for prototypes. ABS offers more strength. PETG provides a good balance. Each material has unique properties. Consider durability and flexibility. Print settings are crucial. Layer height affects strength. Infill density changes weight. Proper calibration ensures good prints.
The video supplied a 3D print file link. This simplifies the process. Download the file. Load it into your slicer software. Adjust settings as needed. Then, start printing your parts. This method offers unparalleled customization. It empowers your DIY drone building. Without 3D printing, creating unique drone bodies would be very difficult, or expensive.
Assembling Your Monocopter: Key Steps
Assembly brings your project to life. Follow the video’s instructions carefully. Each step is important. Precision ensures proper function. Here’s a general overview of the build:
-
Prepare 3D Printed Parts: Clean any supports. Ensure smooth surfaces. Check part fitment. Sanding may be needed.
-
Mount the Motor: Secure the brushless motor. It attaches to the main frame. Ensure it is perfectly centered. Proper alignment is vital. Use appropriate screws. Over-tightening can damage plastic.
-
Install the ESC: Connect the ESC to the motor. Solder the motor wires correctly. Connect the ESC to the flight controller. Mind the positive and negative terminals. Insulate all connections. Short circuits are dangerous.
-
Integrate the Flight Controller: Mount the microcontroller securely. Connect it to the ESC and receiver. Ensure all sensors are oriented correctly. This affects flight stability. Proper wiring prevents issues.
-
Attach the Propeller: Secure the propeller firmly. Check its balance first. An unbalanced propeller causes vibrations. These vibrations reduce stability. They can also damage components.
-
Battery Placement: Mount the LiPo battery. Place it to balance the drone. Weight distribution is critical. It impacts flight characteristics. Use hook-and-loop straps. This allows easy removal. It also holds the battery firm.
-
Final Checks: Double-check all connections. Verify solder joints. Ensure no loose wires. Test motor direction. Calibrate the ESC. Prepare for your maiden flight.
Testing and Fine-Tuning Your Single Motor Drone
Once assembled, the real fun begins. Testing your single motor drone is exciting. It reveals any potential issues. Conduct tests in a safe, open area. Clear any obstacles. Prepare for unexpected movements.
Initial flights might be wobbly. This is normal. Adjustments will be necessary. Small changes can make a big difference. Check the propeller balance again. Ensure all components are secure. Re-calibrate your flight controller. Experiment with different settings. This iterative process refines performance. Your Monocopter will soon soar gracefully. Patience is key during this phase. Enjoy the flight of your custom single motor drone!
Your Single-Motor Drone Questions Answered
What is a Monocopter?
A Monocopter is a unique type of drone that uses only a single motor and propeller for lift and control. It achieves flight by spinning its entire body.
How is a Monocopter different from most drones?
Most drones have multiple rotors, but a Monocopter uses just one motor and propeller. Its entire body rotates to generate lift and provide directional control.
What are some main parts I need to build a Monocopter?
To build a Monocopter, you will need key components such as a brushless motor, an Electronic Speed Controller (ESC), a flight controller, a propeller, and a battery.
Why would I use 3D printing for a DIY drone project?
3D printing is very useful for creating custom drone parts like the frame, motor mounts, or propeller hubs. It allows you to design parts that fit perfectly, optimizing weight and strength.
What is a custom PCB and why is it helpful for building drones?
A custom PCB (Printed Circuit Board) simplifies wiring and ensures reliable connections for your drone’s electronics. This helps reduce the overall size and weight, which are critical for better drone performance.