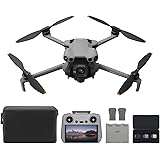
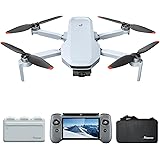
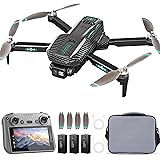
Did you know that building your own FPV drone can save you significant costs? Many enthusiasts spend upwards of $1000 on pre-built models. However, constructing a budget FPV drone build yourself offers incredible value. The video above demonstrates how to assemble a high-performing 5-inch 6S quadcopter. This guide expands on the video, providing written steps and additional insights for beginners. It helps you navigate each stage with confidence and clarity.
Understanding Your Budget FPV Drone Build
Embarking on a drone building journey is exciting. This budget FPV drone build focuses on cost-effectiveness without sacrificing performance. It integrates quality components suitable for both new and experienced pilots. Imagine soaring through the air with a drone you crafted with your own hands. This guide helps make that a reality.
Selecting Essential FPV Components
Choosing the right parts is crucial for any successful build. The video highlights several key components. Each part plays a vital role in your drone’s flight and durability.
- Frame: The IFLIGHT frame provides excellent stacking options. It includes many 3D printed parts for protection and customization. Furthermore, it offers robust construction for freestyle flying.
- Video Transmitter (VTX): A RUSH VTX is highly recommended by the FPV community. It offers reliable signal transmission. Cheaper alternatives are available and can still perform well.
- Camera: The Foxeer T-Rex camera is a solid choice for clear video. It delivers great theoretical video quality. You will observe its performance during actual flight tests.
- Stack (ESC & Flight Controller): The MAMBA F405 MK3 Lite Edition stack is a fantastic budget option. This integrated unit simplifies wiring considerably. It combines the Electronic Speed Controller (ESC) and Flight Controller (FC) into one compact package.
Gathering Your Drone Building Tools
Having the correct tools simplifies the entire process. A well-equipped workspace minimizes frustration and errors. Therefore, consider investing in quality tools for your drone building endeavors.
- Hex Driver Kit: An interchangeable hex driver kit saves space. It provides all necessary sizes for your screws.
- Wire Cutters: Precision wire cutters ensure clean cuts. They are essential for tidy wiring and soldering.
- Soldering Iron: A reliable soldering iron is indispensable. You will use it for all electrical connections.
- Braided Wires: These wires offer a clean finish and motor protection. They prevent shorts that could damage your ESC.
Mastering Soldering for Your Drone
Soldering is a fundamental skill in FPV drone construction. The video demonstrates proper techniques and common fixes. Do not fear making mistakes; they are part of the learning process.
Preparing Your Flight Controller
Connecting wires to your flight controller is the first step. This ensures all peripheral components communicate correctly. Begin by tinning the pads for easier connections.
- Camera Connections: Solder the CAM, GND, and 5V wires. The yellow wire is typically for video, black for ground, and red for power.
- Receiver Connections: For an S.BUS FR SKY receiver, connect GND, 5V, and S.BUS pads. Other receivers like TBS Crossfire or FlySky I.BUS use different pads. Always consult your specific receiver’s documentation.
- Video Transmitter Connections: Connect 9V, GND, VTX, and TX3 pads. The TX3 connection allows goggle-based VTX settings adjustments. This eliminates the need to physically press buttons on the VTX.
Imagine if you accidentally bridged solder on a pad. The video shows a simple fix: apply the iron, move down, and clean the tip. This technique effectively removes excess solder. Patience is key when soldering, especially for beginners.
Assembling Your Electronic Speed Controller (ESC)
The ESC manages power to your motors. Proper assembly ensures smooth and reliable flight. This section focuses on the capacitor and main power lead.
- Low ESR Capacitor Installation: This capacitor helps filter electrical noise. Install the negative side to the minus pad and the positive to the plus pad. Ensure it does not touch the carbon fiber frame to prevent shorts.
- XT60 Power Lead Soldering: This can be challenging due to thick wires. Connect the red wire to the positive pad and black to the negative (ground). The ground pad often requires more heat due to its heat-sink properties. Apply solder to the pads first, then the wire.
The video suggests using a soldering iron at around 380 degrees Celsius for optimal results. For thicker wires, a temperature of 440 degrees Celsius might be necessary. This helps melt the solder properly. Always protect your work surface with a silicone pad, as demonstrated in the video. This prevents accidental burns.
Connecting Motors and Final Assembly
After handling the main electronics, motor connection and final assembly are next. This brings your FPV drone closer to completion. Pay close attention to motor numbering and orientation.
Wiring Your Motors to the ESC
Each motor connects to specific pads on the ESC. Correct wiring is essential for proper motor spin direction. The video guides you through this process.
- Pre-Tinning ESC Pads: Heat each pad and apply a small amount of solder. Ensure the tip of your iron is clean and shiny.
- Motor Wire Soldering: Carefully solder each motor wire to its corresponding pad. Avoid dropping solder onto other components. This could cause shorts or damage.
Imagine if a small piece of solder fell onto a motor winding. This could fry your motor or ESC. Therefore, maintain a clean workspace. Exercise extreme caution during these steps. Proper heat application ensures strong, shiny solder joints.
Understanding Motor Orientation
FPV drones follow a standard motor numbering convention. Motor number one is always the back-right motor. The sequence continues counter-clockwise: one, two, three, four. This configuration is vital for flight controller setup later. It ensures your drone responds correctly to commands.
Completing Your FPV Quadcopter
Final touches secure your components and protect your investment. These steps enhance durability and functionality. Therefore, do not rush these concluding stages.
- Mounting the Stack: Use appropriate stand-offs and screws. Ensure enough clearance between the stack and frame components. This prevents short circuits.
- Securing the VTX and Camera: Use screws and 3D printed parts for stable mounting. Properly route antenna wires. This ensures optimal signal reception.
- Adding Frame Protectors: Install these before motor screws. They extend the lifespan of your frame. Protectors are especially useful when landing on hard surfaces like concrete.
The finished budget FPV drone build weighs 371 grams (without propellers, battery, GoPro, or antenna). This is a respectable weight for a freestyle quad. Thicker arms provide enhanced durability, a significant advantage for freestyle flying. The AM AX motors are known for high performance. They contribute to an agile and responsive flying experience.
This comprehensive budget FPV drone build covers all physical assembly stages. The next steps involve software setup, typically using Betaflight. This final configuration fine-tunes your drone’s flight characteristics. Many resources are available online for this process. Congratulations on building your own budget FPV drone!
Your Budget FPV Drone Build: Q&A for Aspiring Pilots
Why should I build my own FPV drone?
Building your own FPV drone can save you a lot of money compared to buying a pre-built model. It also gives you the rewarding experience of crafting it yourself.
What are some essential parts I need for a budget FPV drone build?
Key components include a frame, a Video Transmitter (VTX), a camera, and a stack, which combines the Electronic Speed Controller (ESC) and Flight Controller (FC).
What is soldering, and why is it important for building an FPV drone?
Soldering is a fundamental skill used to create electrical connections by melting solder to join wires and components. It’s essential for connecting all the electronic parts of your drone.
What is a ‘stack’ in the context of FPV drone building?
A ‘stack’ refers to an integrated unit that combines the Electronic Speed Controller (ESC) and the Flight Controller (FC) into one compact package. This helps to simplify the drone’s wiring.
Is there a specific way to connect and orient the motors on an FPV drone?
Yes, FPV drones use a standard motor numbering convention where the back-right motor is number one, and the sequence continues counter-clockwise. This orientation is crucial for proper flight controller setup.