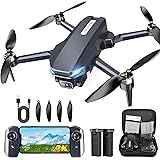
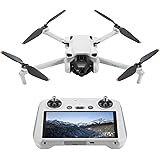
Building your very own tiny Arduino FPV drone is an incredibly rewarding journey, as demonstrated in the insightful video above. It’s a hands-on project that not only culminates in a functional, miniature flying machine but also offers an in-depth learning experience into the fascinating world of electronics, programming, and aerodynamics. Whether you’re aiming for thrilling first-person view racing or simply seeking a deeper understanding of how drones operate, this DIY approach provides an unparalleled opportunity to explore your creativity and technical skills.
The beauty of this project lies in its accessibility and the sheer satisfaction of seeing your creation take flight. From choosing between a humble popsicle stick frame or a precisely 3D-printed design, to meticulously soldering components and fine-tuning flight parameters, every step is a valuable lesson. Let’s delve deeper into the intricacies of crafting such a small yet powerful device, expanding on the concepts and challenges highlighted in the video.
The Appeal of a Miniature DIY FPV Drone
There’s something uniquely captivating about a miniature drone, especially one you’ve built yourself. Unlike larger models, a tiny Arduino FPV drone is often perfect for indoor flights, navigating tight spaces, and learning the ropes without significant risk. This project, in particular, champions the spirit of DIY, encouraging makers to source common Arduino-compatible modules on a low budget, making advanced technology more approachable.
Furthermore, the educational value is immense. Imagine if you could understand every hum and whir of a complex machine simply because you put it together piece by piece. That’s precisely what this project offers. It transforms abstract concepts like microcontrollers, gyroscopes, and radio transceivers into tangible, interactive experiences. It’s about more than just flying; it’s about understanding the “how” and “why” behind every controlled movement in the air.
Gathering Your Essentials: Parts for Your Mini FPV Drone
Embarking on any DIY project begins with assembling the right components. For a tiny Arduino FPV drone, careful selection ensures both performance and compatibility. The video provides a clear list, and understanding the role of each part is key to a successful build.
Frame Components
- Brushed Coreless Motors with Propellers: These are chosen for their lightweight nature and efficiency in small applications. The video cleverly points out that getting motors with sufficient thrust (e.g., 14 grams per motor vs. 6 grams) and correctly opposing rotation pairs is absolutely crucial for lift-off and stable flight.
- Popsicle Sticks or PLA Filament: Your choice of frame material. Popsicle sticks offer a budget-friendly, hands-on crafting experience, while 3D printing provides a precise, potentially lighter, and more durable frame.
- PVC Glue Stick & Super Glue: Essential for assembling wooden frames and strengthening fragile areas.
- Bicycle Wheel Tube Rubber: Used for creating bumper guards, offering a layer of protection against minor crashes.
Electronics Core
- Custom Motor Driver Board Parts: This includes MOSFETs, Schottky flyback diodes, and 10-kΩ pulldown resistors. These are the unsung heroes that translate signals from your flight controller into power for the motors.
- Arduino Pro Mini (3.3V version): The brains of your drone, acting as the microcontroller. The 3.3V version is ideal for running directly off a LiPo cell, simplifying the power supply.
- MPU6050 Gyro Accelerometer Sensor: This module is vital for determining the drone’s orientation and movement in space, feeding critical data to the Arduino for stable flight.
- NRF24 Radio Transceiver: This small module handles the wireless communication between your custom transmitter and the drone, allowing you to send flight commands.
Power & FPV
- LiPo Cell with Connectors (e.g., 250 mAh): A lightweight, high-energy-density battery specifically designed for RC applications.
- 3 Gram FPV Camera (e.g., 600 TVL resolution with built-in transmitter): For real-time first-person view. Its tiny size and integrated transmitter keep the drone light and simple.
- FTDI or USB to Serial Converter: A crucial tool for programming the Arduino Pro Mini on the drone.
Every component plays a specific role, and understanding this synergy is part of the DIY joy. Imagine if you tried to drive a car without understanding its engine; you might get somewhere, but you wouldn’t know why it goes!
Crafting the Frame: From Popsicle Sticks to 3D Prints
The frame is the skeleton of your tiny Arduino FPV drone, providing the structural integrity for all components. The video offers two distinct paths, catering to different skill sets and access to tools.
For those opting for the DIY-friendly wooden frame, the process involves printing out a blueprint sheet, meticulously cutting stencils, and gluing them onto popsicle sticks. The attention to detail here is paramount. Cutting out pieces with a hobby knife requires a steady hand, and soaking fragile parts in super glue, as demonstrated, is a smart preventative measure against breakage. The sanding process to thin down the frame pieces (except for the motor arms) is a brilliant weight-saving technique. Imagine trying to fly a heavier drone with weak motors; it simply wouldn’t work. The goal is always to reduce weight while maintaining strength.
Alternatively, the option to 3D print the frame offers precision and consistency, often saving time on intricate cuts and sanding. While the video focuses on the wooden frame for a more hands-on feel, a 3D-printed frame can be incredibly robust and lightweight, designed with specific component mounting points in mind. Whichever method you choose, ensuring a perfectly flat surface for the drone to rest on is vital, as even slight imbalances can lead to wobbling, as the video later reveals.
The Heart of the Drone: Building the Motor Driver Board
The motor driver board is where the flight controller’s commands transform into actual motor power. It’s a critical interface that bridges the low-power signals from the Arduino to the higher-power demands of the brushed motors.
Understanding MOSFETs and Flyback Diodes
At the core of the motor driver are the MOSFETs (Metal-Oxide-Semiconductor Field-Effect Transistors). These act as electronic switches, rapidly turning the motor current on and off based on the PWM (Pulse Width Modulation) signals from the Arduino. This rapid switching controls the speed of each motor. The Schottky flyback diodes are equally important; they protect the MOSFETs from voltage spikes (inductive kicks) that occur when the motors, which are inductive loads, are rapidly switched off. Without these diodes, the MOSFETs could be quickly damaged. The 10-kΩ pulldown resistors ensure that the MOSFETs remain in a known, off state when no signal is present, preventing erratic motor behavior.
Precision Soldering & ESD Protection
Soldering surface mount components onto a perforated board requires precision, especially given their tiny size. The video emphasizes the importance of wearing an electrostatic discharge (ESD) wrist strap. Imagine building a delicate circuit only for a tiny spark of static electricity from your body to zap and destroy a sensitive component; it’s a common and frustrating pitfall for electronics enthusiasts. ESD protection is not just a recommendation; it’s a necessity when working with integrated circuits and transistors.
After soldering, reducing the board’s weight and size by cutting and sanding it is another testament to the attention to detail required for a truly tiny drone. Every gram counts when aiming for efficient flight.
Integrating the Brains: Flight Controller & Radio
With the frame and motor driver in place, the next step involves integrating the electronic brains of the tiny Arduino FPV drone – the flight controller and the radio transceiver. These components work in tandem to interpret your commands and maintain stable flight.
Assembling Your Flight Controller Stack
The Arduino Pro Mini, paired with the MPU6050 gyro accelerometer sensor, forms the flight controller. The MPU6050 constantly feeds data about the drone’s angular velocity and acceleration to the Arduino, which then calculates the drone’s orientation and makes necessary adjustments. The video shows how removing pin headers from modules like the NRF24 and replacing them with direct wire connections is a smart way to shave off precious weight and space. Imagine a tiny racing car where every milligram affects its speed; the same principle applies here for optimal flight performance.
Powering Your Modules Safely
Powering these modules correctly is vital. The Arduino Pro Mini’s 3.3-volt version is chosen to run directly from the LiPo battery, offering a consistent power supply. The NRF24 radio module, which also operates at 3.3 volts, is powered from the gyro module’s regulator, which includes filtering capacitors. These capacitors are crucial for smoothing out any power fluctuations, preventing electrical noise from affecting the sensitive radio communication. Furthermore, using Kapton tape or hot glue to insulate exposed pins and connections is a simple yet effective way to prevent short circuits, which could otherwise lead to component damage or complete system failure.
The Control Hub: Your Custom Arduino Transmitter
A drone is only as good as its control. The custom-built Arduino transmitter, inspired by existing designs and modified for enhanced functionality, is your direct interface with the tiny Arduino FPV drone. This DIY approach extends the learning experience beyond the drone itself.
The transmitter, built around an Arduino, incorporates essential elements like joysticks for control inputs, toggle switches for activating modes (like arming the drone or triggering a beeper), and even a charging port and voltage divider for monitoring battery levels. Imagine having a car without a fuel gauge; you wouldn’t know when you’re about to run out of power. The voltage divider is that essential gauge for your transmitter’s battery.
The availability of modified enclosure designs and wiring diagrams, along with specific transmitter code, significantly lowers the barrier to entry for building this crucial part of the system. This open-source spirit allows makers to adapt and customize their control experience.
Bringing It to Life: Programming Your Tiny FPV Drone
Once the hardware is assembled, the software breathes life into the tiny Arduino FPV drone. This involves programming the Arduino with the flight control firmware and configuring it for optimal performance.
Connecting and Uploading Firmware
The FTDI or USB to serial converter is the bridge between your computer and the Arduino Pro Mini. It allows you to upload the MultiWii firmware, an open-source flight control software widely used in DIY drone projects. The video walks through the critical steps: selecting the correct Arduino board, voltage rating, and COM port, then uploading the code. The specific instruction to hit the Arduino’s reset button at the right moment during upload is a classic Arduino trick that many beginners learn through trial and error, highlighting the nuances of microcontroller programming.
The flexibility to adjust pin definitions in the code, or swap radio channel values if joysticks appear reversed, underscores the customizability of a DIY build. Imagine if you could fine-tune your car’s steering sensitivity just by tweaking a few lines of code; that’s the power you get with an Arduino-based system.
Configuring MultiWii for Flight
After uploading the firmware, the MultiWii configurator software becomes your control panel. This graphical interface allows you to visualize the drone’s orientation in real-time and verify that your transmitter’s joystick movements are correctly registered. Crucially, it’s where you define switch channels for arming the drone (allowing motors to spin) and activating auxiliary functions like a beeper alarm (useful for locating your tiny drone in tall grass!). Saving these changes to the drone’s memory is a vital final step before attempting flight.
The Art of Flight: Troubleshooting & Refinements
The video truly shines when it comes to troubleshooting, a phase that every DIY builder will inevitably encounter. It’s a testament to the fact that building something from scratch is rarely a straightforward path. The journey to a flyable tiny Arduino FPV drone is often one of perseverance and methodical problem-solving.
Powering Up and Facing Challenges
The initial disappointment of the drone not lifting off and simply resetting is a common hurdle. This immediate feedback signals a fundamental problem that needs to be addressed. The first suspect, as identified in the video, was the motors. If motors don’t provide enough thrust, or if they lack the correct rotational direction pairs (clockwise and counter-clockwise), stable flight is impossible. The upgrade from 6 grams of thrust per motor to 14 grams, yielding a potential 60 grams total thrust for a 30-gram drone, demonstrates a critical power-to-weight ratio improvement.
Battling Electrical Noise: PWM and EMF
Even with new motors, the Arduino resetting issue persisted, indicating deeper electrical problems. The video’s use of an oscilloscope (like the GOCHIFIX 3-in-1 tool highlighted) to diagnose low PWM frequency (500 Hz, needing at least 2 kHz) is an excellent example of scientific troubleshooting. Imagine trying to identify a faint hum in an engine without specialized tools; an oscilloscope is your ear for electrical signals. Incorrect PWM frequency generates excessive electrical noise, which can interfere with the sensitive microcontroller, causing resets.
The Gyro’s Sensitivity and EMF Shielding
The ultimate breakthrough in preventing Arduino resets came from a surprisingly simple solution: raising the gyro sensor farther from sources of electrical noise. This highlights the extreme sensitivity of these sensors to Electromagnetic Interference (EMI) or Electromagnetic Fields (EMF) generated by switching currents (like those from the motors and motor driver). Furthermore, adding an EMF blocking shield made from copper sheet to the underside of the Arduino is a professional-level solution. Imagine trying to get a clear radio signal next to a buzzing power transformer; an EMF shield is like insulating your radio from that interference, allowing the gyro to perform its crucial job accurately.
Calibrating for Stability: Basic PID Tuning
Once the drone finally achieved lift-off, the challenge shifted to stability. Aggressive wobbling side-to-side pointed towards issues with how the motor pairs were “out of tune.” This is where PID (Proportional-Integral-Derivative) tuning comes into play. The video briefly touches on lowering ‘P’ values for roll and pitch in MultiWii to reduce oscillations. PIDs are essentially the drone’s “nervous system,” determining how it reacts to errors in orientation. Reducing ‘P’ makes the drone less aggressive in correcting itself, leading to smoother flight. Additionally, lowering the “rate” and raising “expo” values makes the drone less sensitive to joystick inputs, providing a smoother, more manageable flying experience for beginners. Imagine driving a race car with an overly sensitive steering wheel; a bit of expo makes it more forgiving.
FPV Immersion & Final Touches
The installation of the 3-gram FPV camera transforms the drone from a mere flying object into an immersive experience. Directly feeding from the battery’s power, this camera, paired with FPV goggles, offers a live, first-person perspective, making flying incredibly engaging.
Securing the battery connector, mounting the 250 mAh LiPo cell with a rubber band pocket, and ensuring correct propeller orientation are the final steps. The video’s emphasis on balancing the drone by sliding the battery, depending on its flight tendencies, is a practical tip for any pilot. This tiny Arduino FPV drone, weighing in at just 30 grams, is considered a “light wind flyer,” perfect for indoor or calm outdoor environments.
The journey from a collection of parts to a fully functional, custom-built tiny Arduino FPV drone is a testament to the maker spirit. It’s a process filled with challenges, learning, and immense satisfaction. The troubleshooting phase, in particular, showcases the true essence of engineering: identifying problems, experimenting with solutions, and iterating until success is achieved. This DIY approach not only saves money but fosters a deeper understanding of technology and empowers individuals to bring their imaginative projects to life, proving that with perseverance, you truly can make anything you set your mind to.


